Taking inventory a constant thorn in the side? Too many locations and too many products turning inventory data into a mess that is impossible to manage in real time? A lack of accurate inventory records making it necessary to take inventory manually in a time-consuming and labor-intensive process?
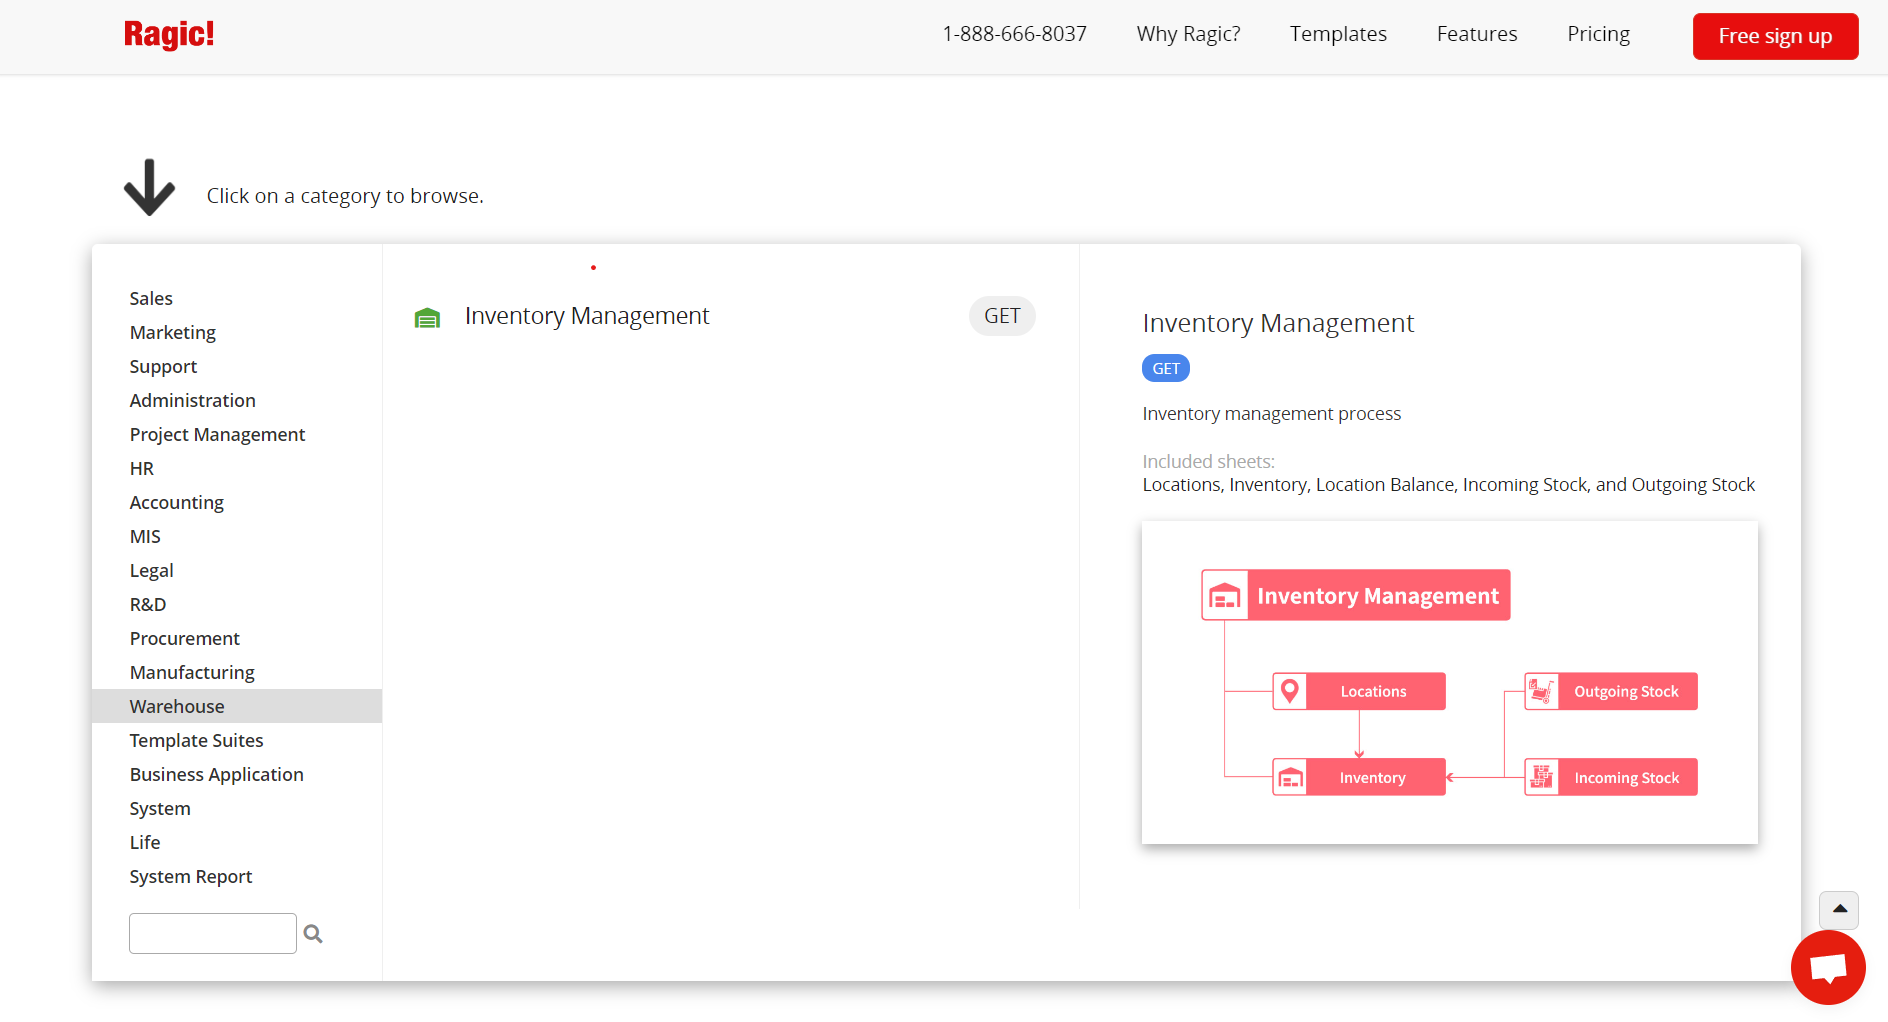
Ragic’s Inventory Management template makes inventory management easy by offering quick access to inventory data at each location and streamlining incoming and outgoing stock record management in the database.
Our Sales Order, Purchasing, and Inventory Management template is comprised of three separate templates - Sales Order Management, Purchasing, and Inventory Management. If you only need the functions of one of these, it can be installed separately as well.
Don't have a Ragic account? Click here to install only the Inventory Management template or click here to install the entire Sales Order, Purchasing, and Inventory Management templates. If you’re already a Ragic user, the Sales Order, Purchasing, and Inventory Management templates are available under the Template Suites category in the Install Templates.
Please see below for instructions on the Inventory Management template.
The Inventory Management template is designed to manage inventory from locations to total quantities at each location. It also manages sheets related to inventory change, such as Outgoing Stock, Incoming Stock, and Inventory Transfer.
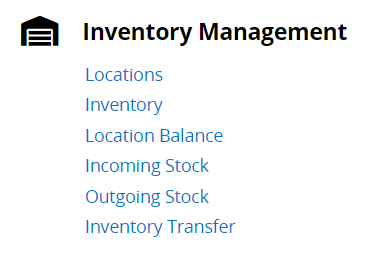
The data should be added in the following order:
Locations → Inventory (Location Balance), (Outgoing Stock), (Incoming Stock), (Inventory Transfer)
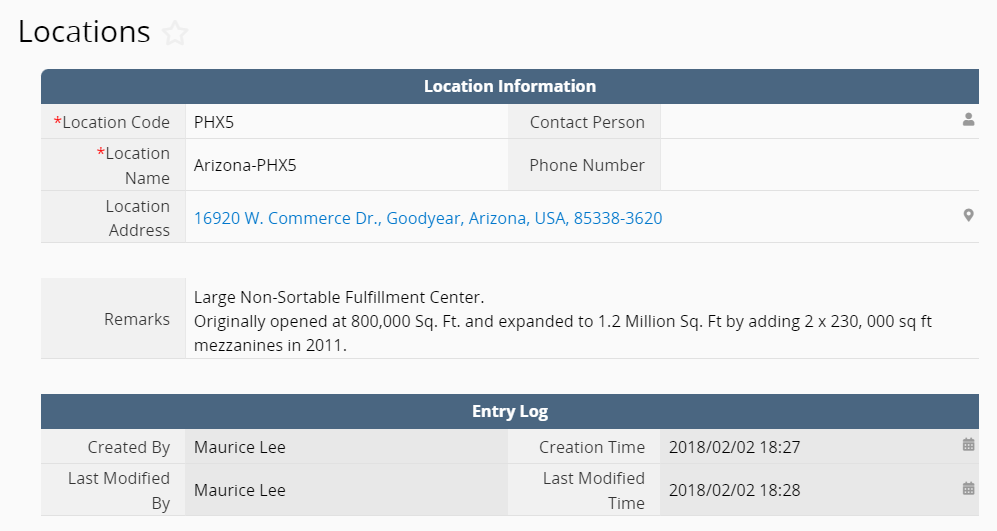
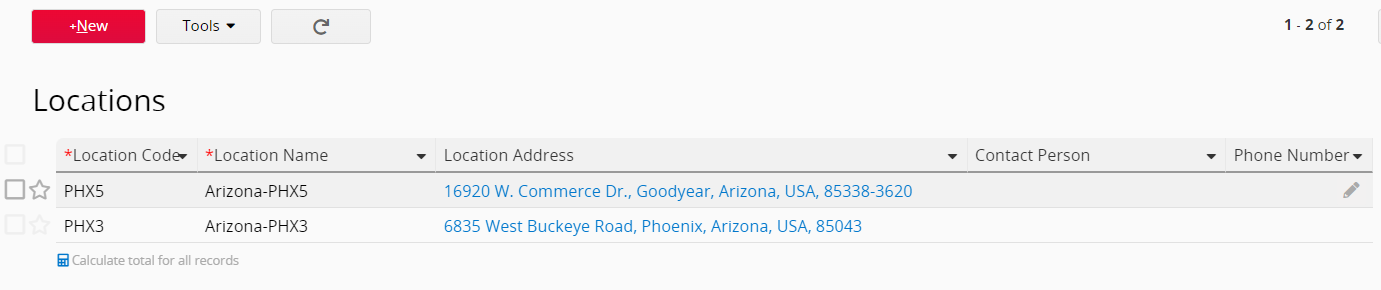
The Locations sheet is used to manage information at different locations. The Location Code must be a unique value and, like the Location Name, is required.
The Inventory in the Inventory Management template is divided into two levels. One level is the Inventory, which focuses on individual products; the other is the Location Balance, which focuses on the quantity of each product at each location. (For example, a product may be stored at multiple locations.)
The Inventory and the Products (SO) in the Sales Order Management template and the Products (PO) in the Purchasing template are multiple versions of the sheet, which means they share the same data source (i.e. one Products (SO) record is one record in Inventory and one record in Products (PO)).
Unlike the Products (SO) sheet, the subtable in the Inventory template is used to manage the quantity of a product at each location. The sum of the quantities at individual locations is the Total Qty.
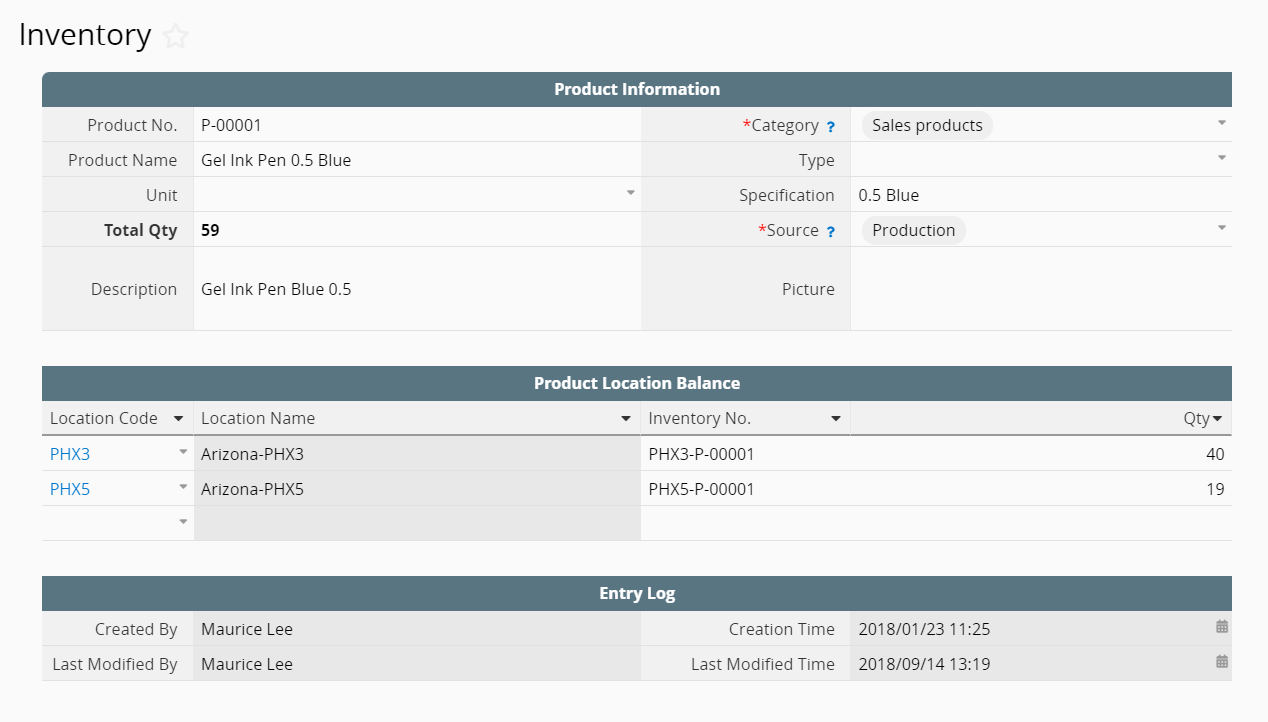
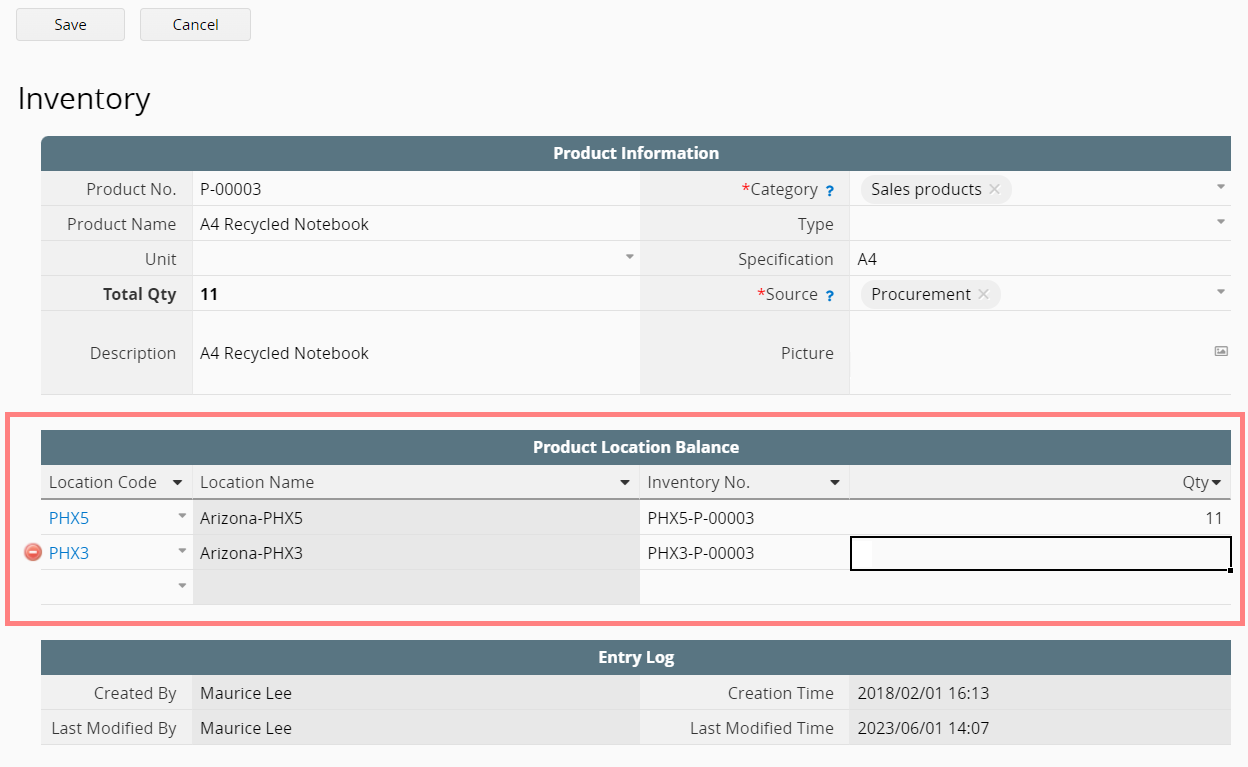
Location Balance in the Inventory sheet can be added directly in the subtable. After selecting the Location Code, the Location Name will be automatically loaded and an Inventory No. (Location Code-Product No.) will be automatically populated. Please be sure to enter the Qty in Location Balance.
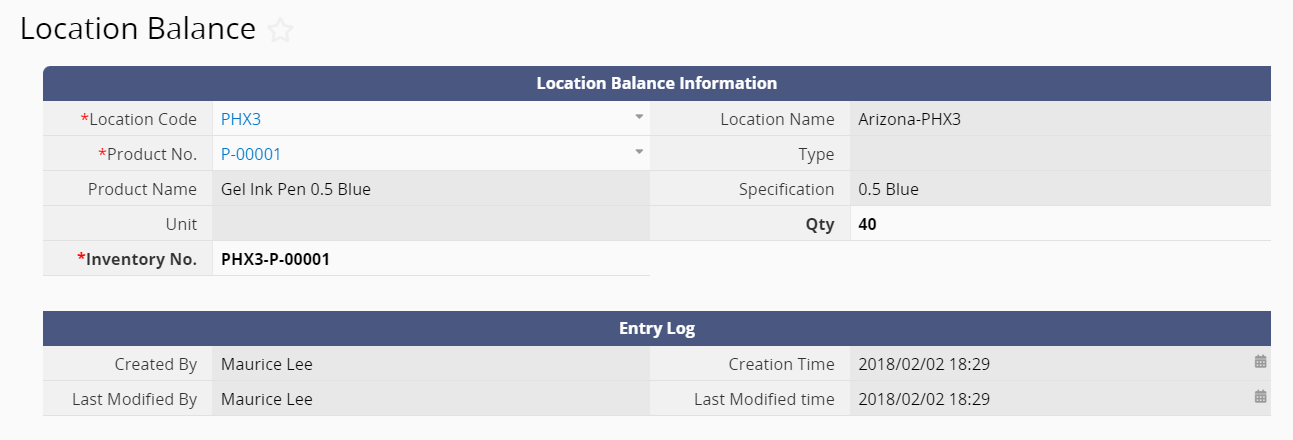
This is used to record the quantity of a product at a location. The current value of the Inventory No. is “Location Code-Product No.” and it is a unique value in this sheet.
This sheet is a new sheet generated from the subtable in the Inventory sheet, so it is linked to the subtable in the Inventory sheet. Each record in the subtable in the Inventory sheet corresponds to a record in this sheet.
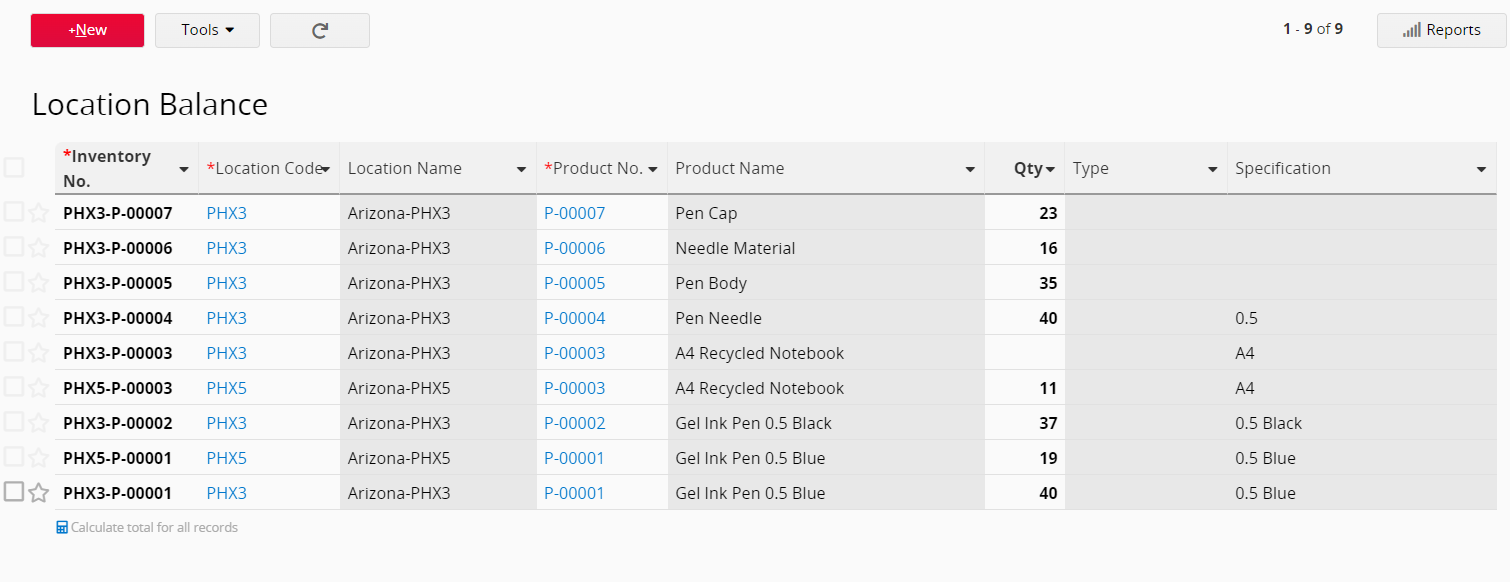
In addition to adding data from the Product Location Balance subtable in the Inventory sheet, data can also be added from this sheet. After selecting the Location Code, the Location Name will be automatically loaded. Similarly, selecting the Product No. will automatically load the Product Name, Type, and Specification. Inventory No. will be automatically populated by the formula as “Location Code-Product No.”. Finally, you just need to enter Qty.
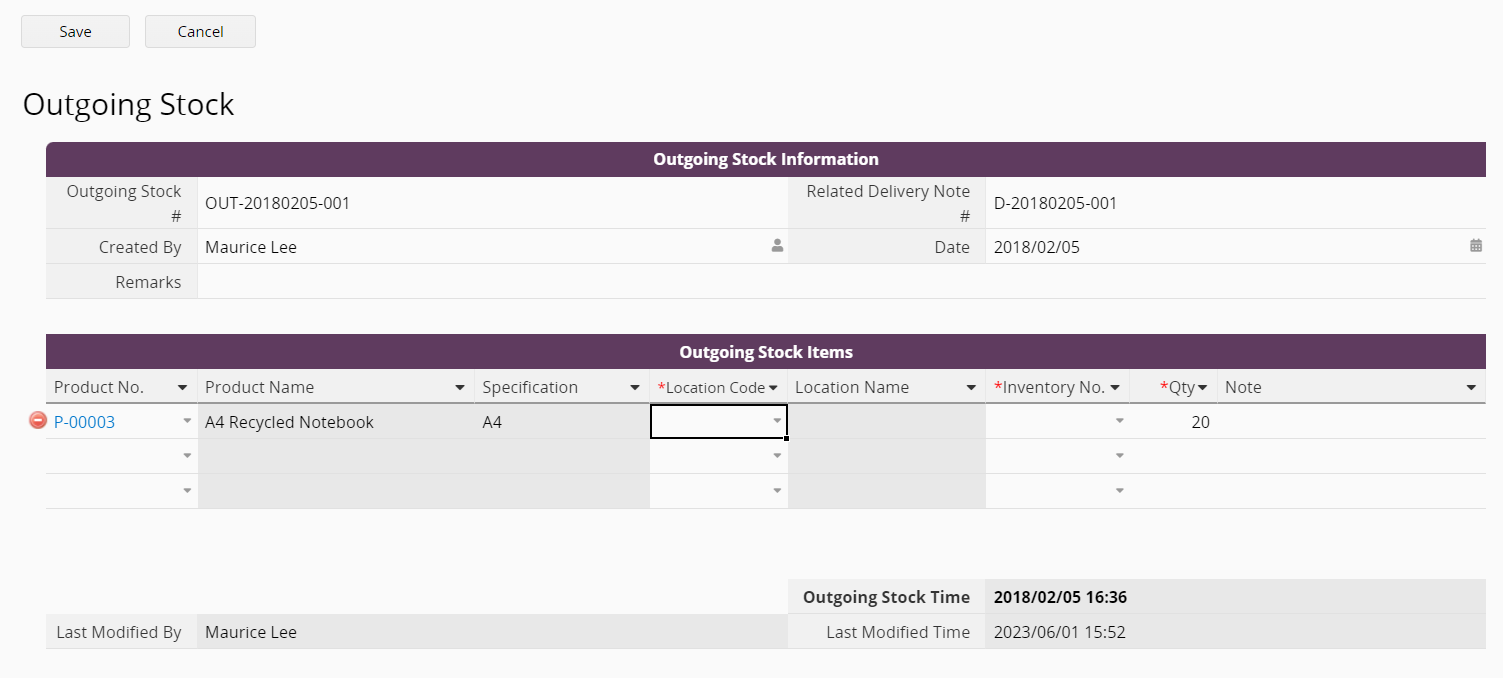
The outgoing stock record can be created by converting a record from the Delivery Note in the Sales Order Management template, or by manually creating a record on the Outgoing Stock sheet. In the Outgoing Stock Items subtable, select a Location Code to determine the inventory location the products will be shipped from. Then, select Inventory No. and confirm the Qty of outgoing stock.
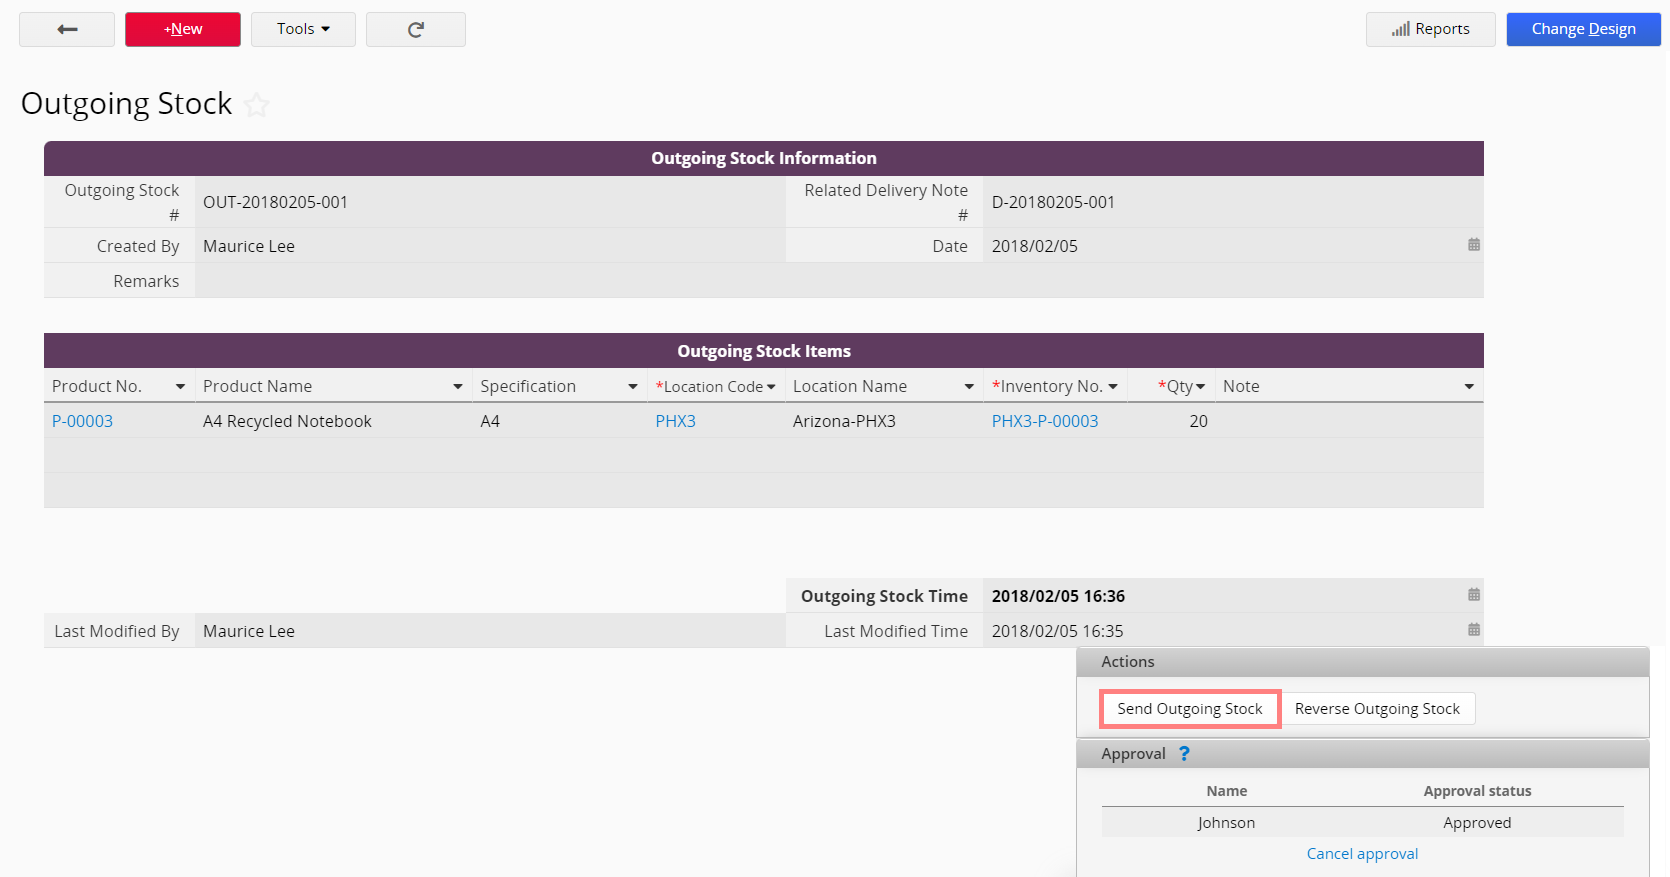
After all records are created in the Outgoing Stock sheet, you can start the approval flow. When the record is approved, you can click the “Send Outgoing Stock” button, and the system will deduct the quantity of the outgoing stock from the Location Balance, and fill in Outgoing Stock Time (date and time when the button is executed) automatically on the Outgoing Stock sheet.
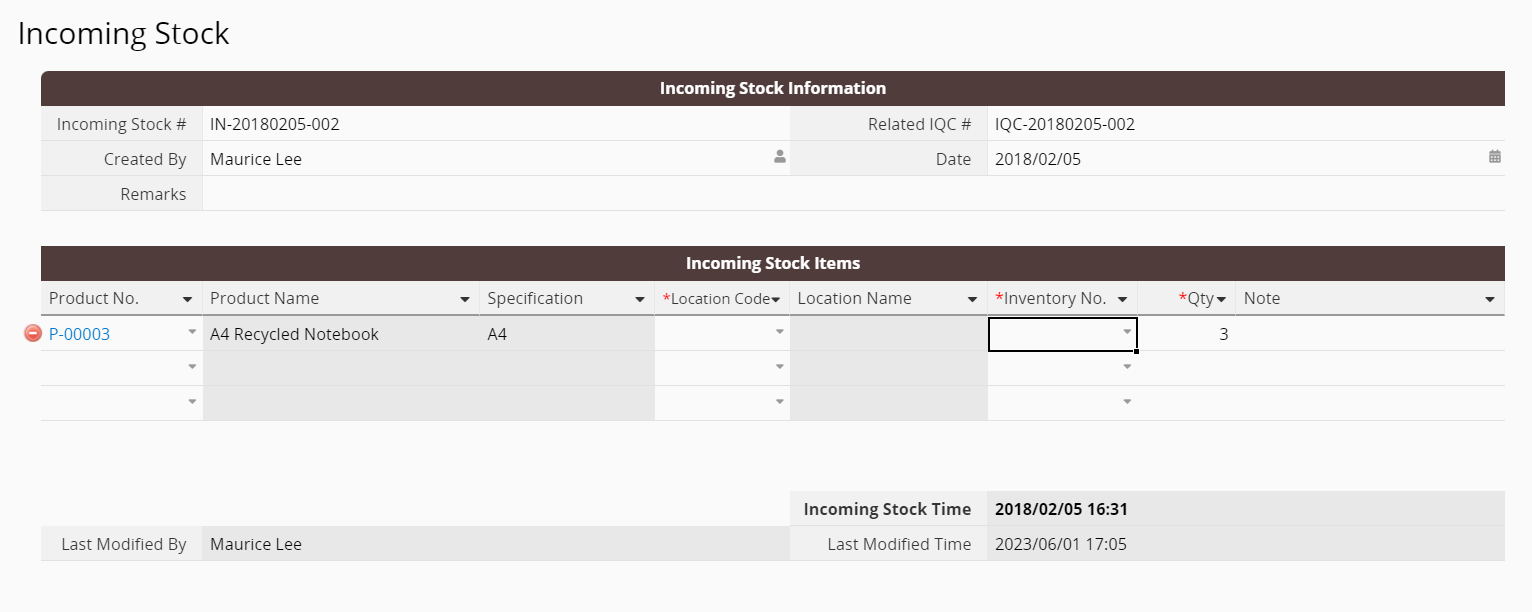
The incoming stock record can be created by converting a record from the Incoming Quality Control in the Purchasing Management template, or by manually creating a record on the Incoming Stock sheet. In the Incoming Stock subtable, select a Location Code to determine the inventory location the product will be stored in. Then, select Inventory No. and confirm the Qty of incoming stock.
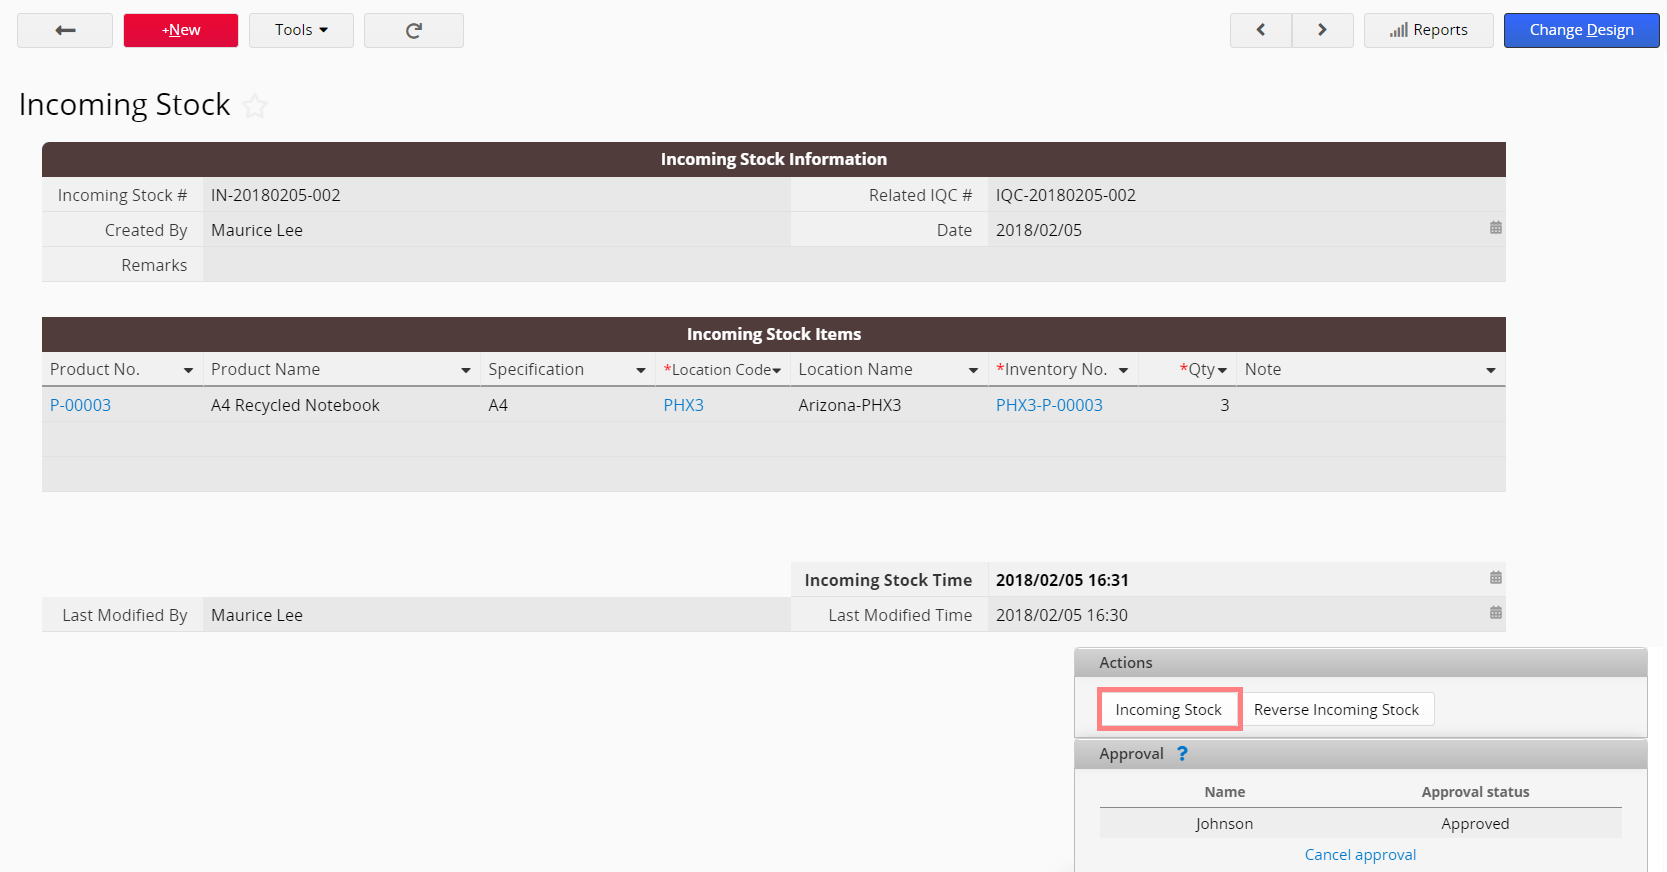
After all records are created in Incoming Stock, you can start the approval flow. When the record is approved, click the "Incoming Stock" button, and the system will add the quantity of the incoming stock to the Location Balance, and fill in the Incoming Stock Time (date and time when the button is executed) automatically on the Incoming Stock sheet.
The Inventory Transfer sheet allows transfer of Location Balance between locations. It supports simultaneous transfers of Location Balance for multiple products.
To create a new record for an inventory transfer, select the Inventory No. in the Transfer Item subtable to have the Product Name, Specification, From Location Code and From Location automatically loaded for the product to be transferred. Enter the Qty and select the To Location Code, and the To Location field will be automatically loaded.
(Inventory No. is the serial number assigned to a product at a location. Therefore, selecting an Inventory No. here will immediately identify which inventory location the product will be transferred from.)
To transfer stock in, please make sure you have created the corresponding Location Balance record for the destined Inventory Location (the "To Location Code" you choose).
Executing the "Transfer" action button is to look up the existing Location Balance records and to add/deduct the quantities according to Inventory No. If the Location Balance record (Inventory No.) does not exist, you won't be able to transfer stock-in, as the system cannot create the record for you.
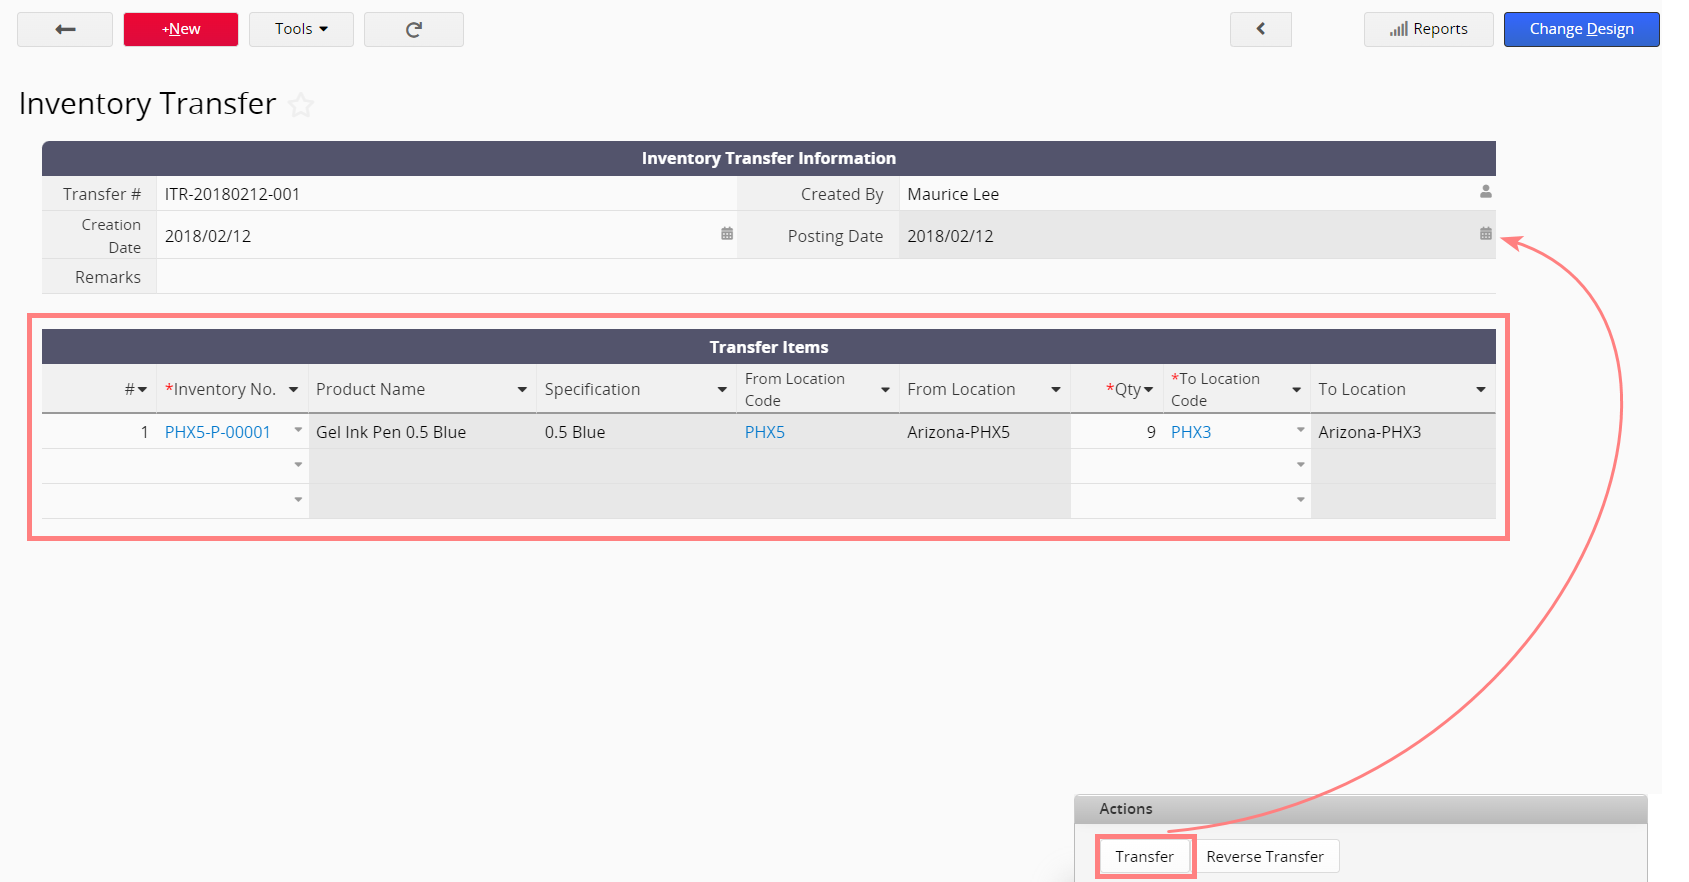
When all records are created, click the Transfer button to execute Transfer. The system will deduct the outgoing quantity for the Inventory No., find the Inventory No. in the Incoming Location (To Location Code), and add the quantity to the balance. The Posting Date is the date on which the transfer is executed.

