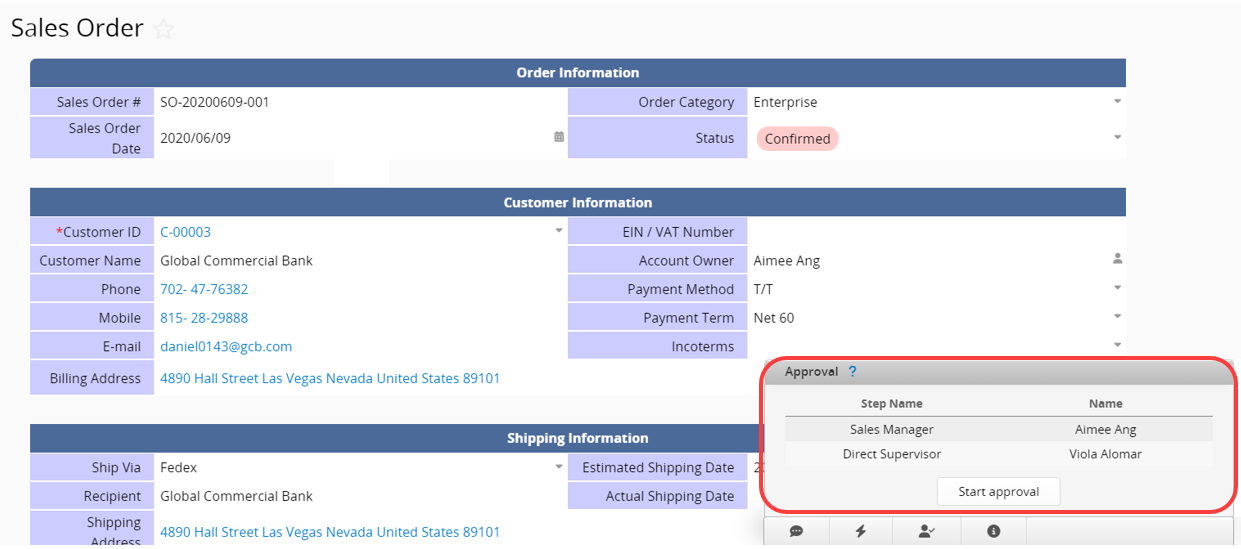
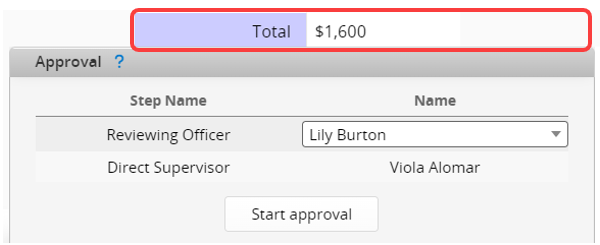
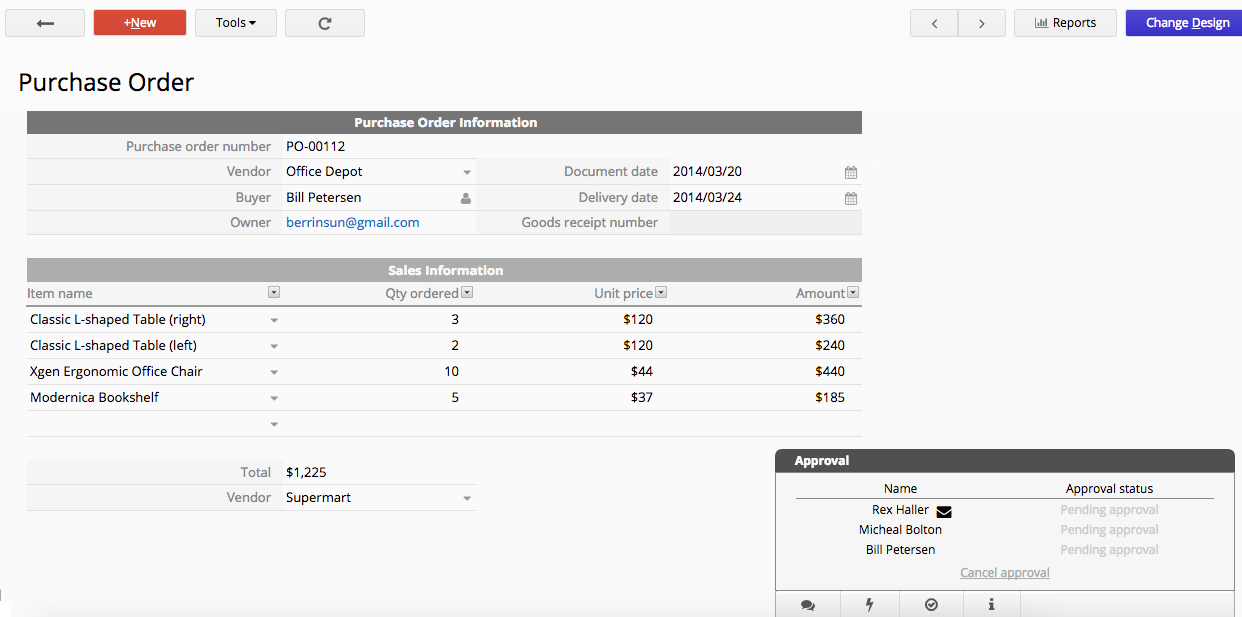
Through the Approval process, users can designate supervisors or specific individuals to review the submitted record.
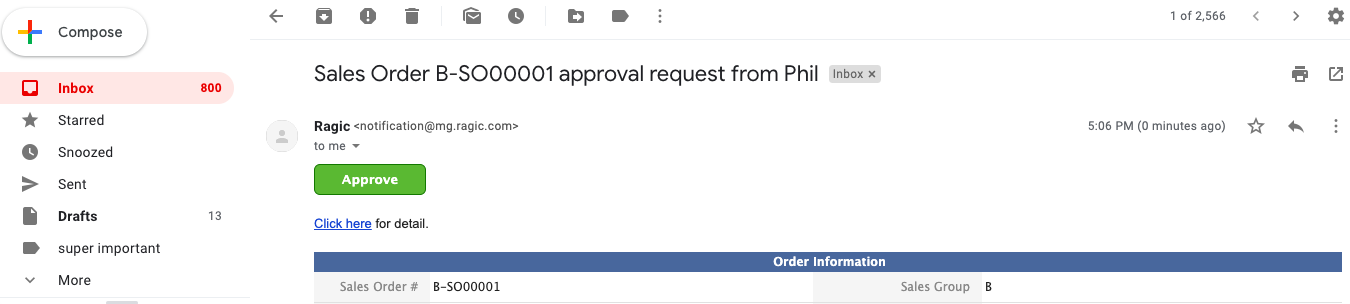
For example, a leave request may go to the "Direct supervisor" for approval, while a Sales Order could require approval from the "Sales Manager". After a user adds a new entry and clicks Start approval, an email is sent to the first approver. Upon their approval, the system notifies the next approver in sequence, proceeding from top to bottom.
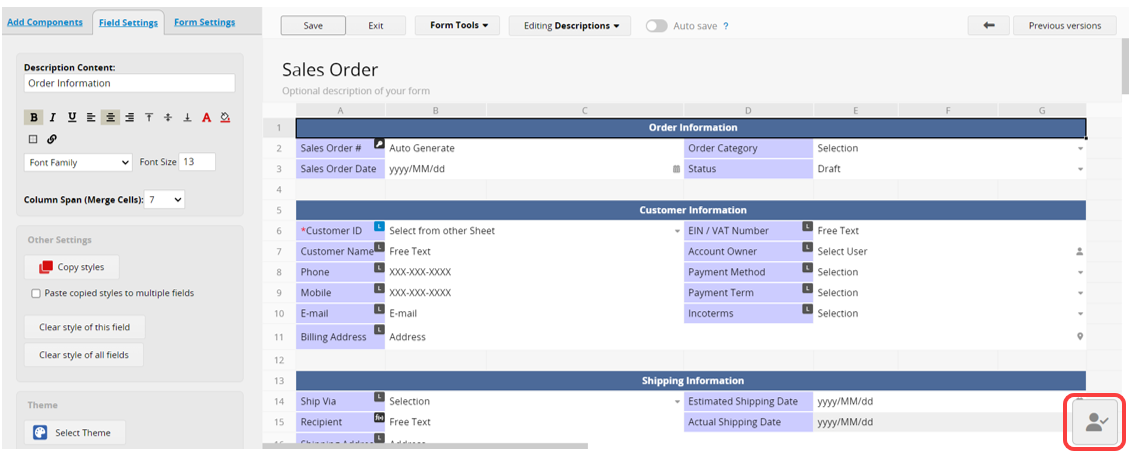
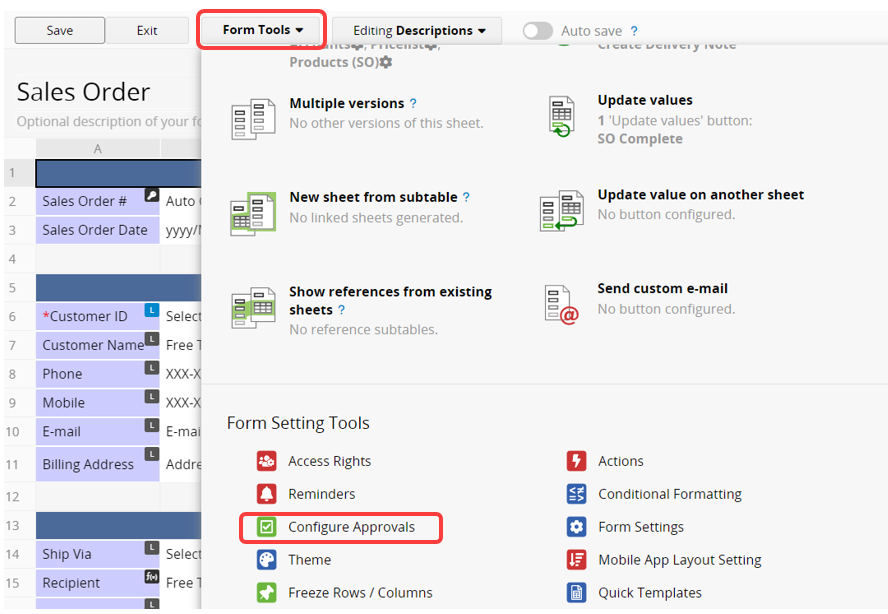
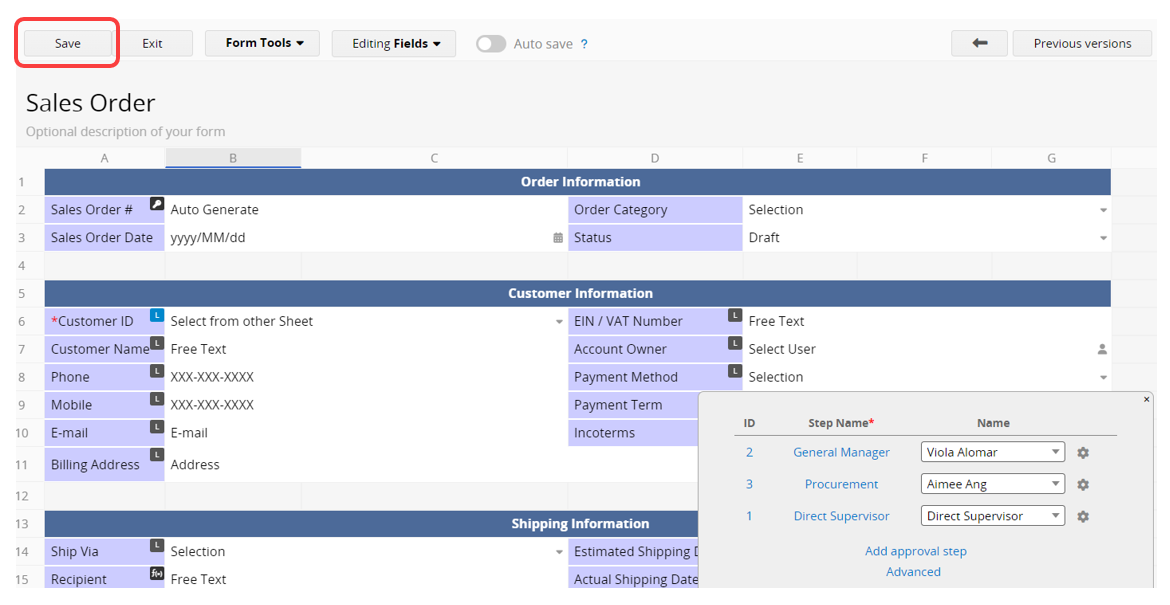
To open the approval setting interface, you can click on the lower-right icon in the Design Mode or access it from the Form Tools.
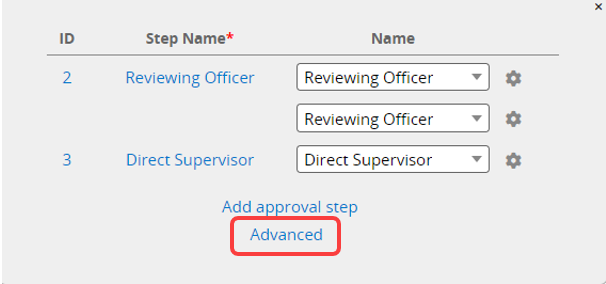
Click Add approval step to add the Approval process.
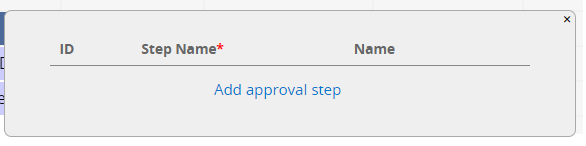
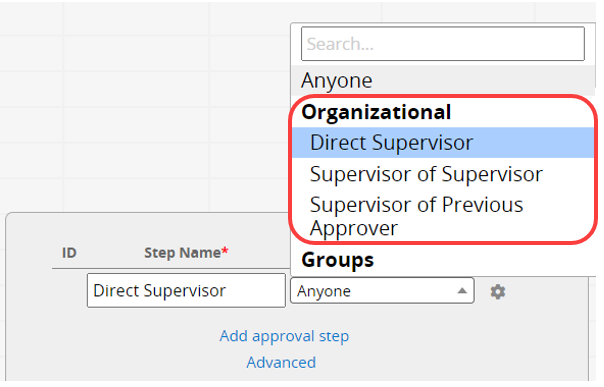
Set the Step Name, which is mandatory, for an approval step such as "Purchasing Manager" or "Project Manager".
In the Name field, specify the User for a fixed approver, or choose a user group where an approver can be selected from when submitting for approval.
You can choose approvers from the Organizational menu with the following options:
1. Direct Supervisor sends the request to the user's direct supervisor.
2. Supervisor of Supervisor directs the request to the user's supervisor's supervisor.
3. Supervisor of Previous Approver routes the request to the previous approver's supervisor.
Note: To enable the approval functionality for direct supervisors and their supervisors, you will need to use the Direct Supervisor field in the system User sheet. If this field is not available in your sheet, please contact Ragic support to update it.
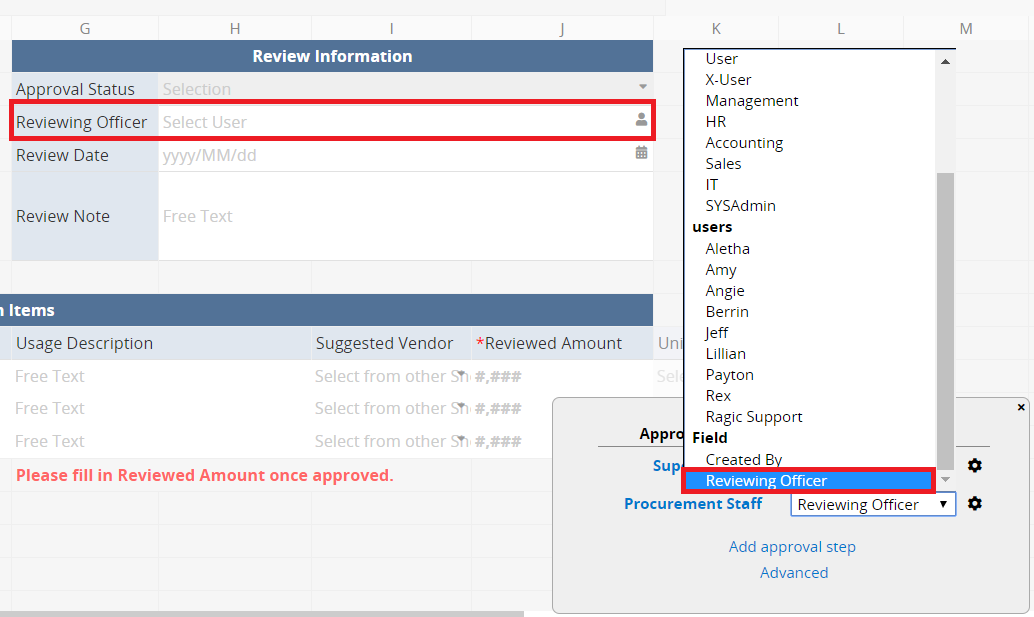
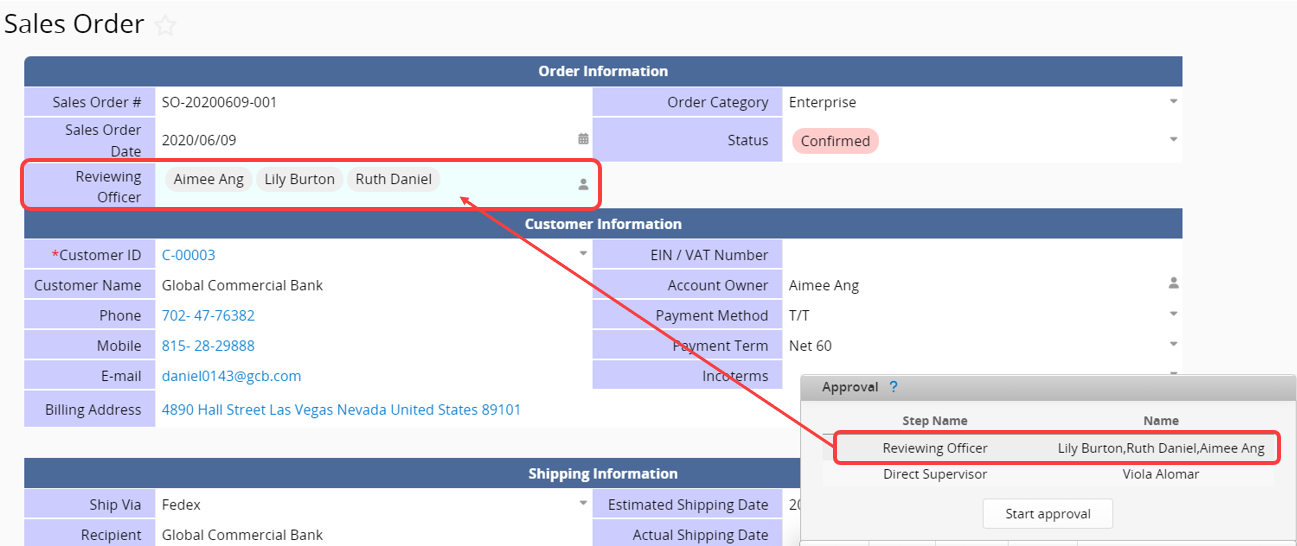
You can also select approvers from the Select User or Select Group field.
For example, you can send an approval request to the "Reviewing Officer" (the designated approver in charge) of this record instead of selecting someone from the "Procurement group" as an approver.
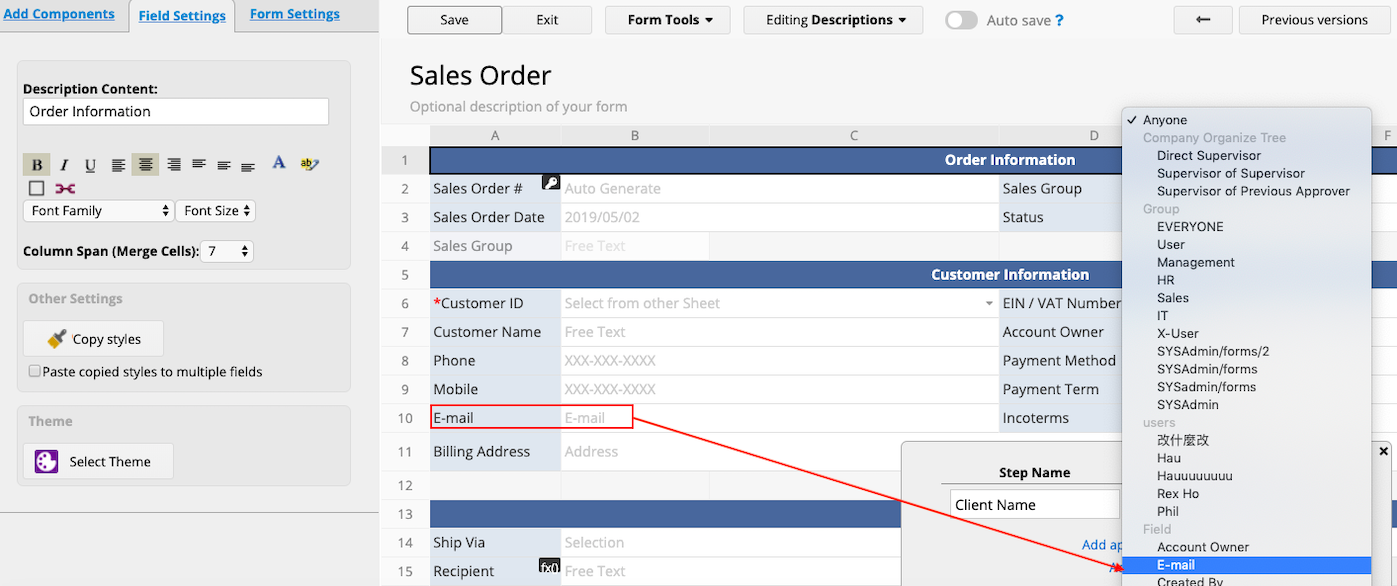
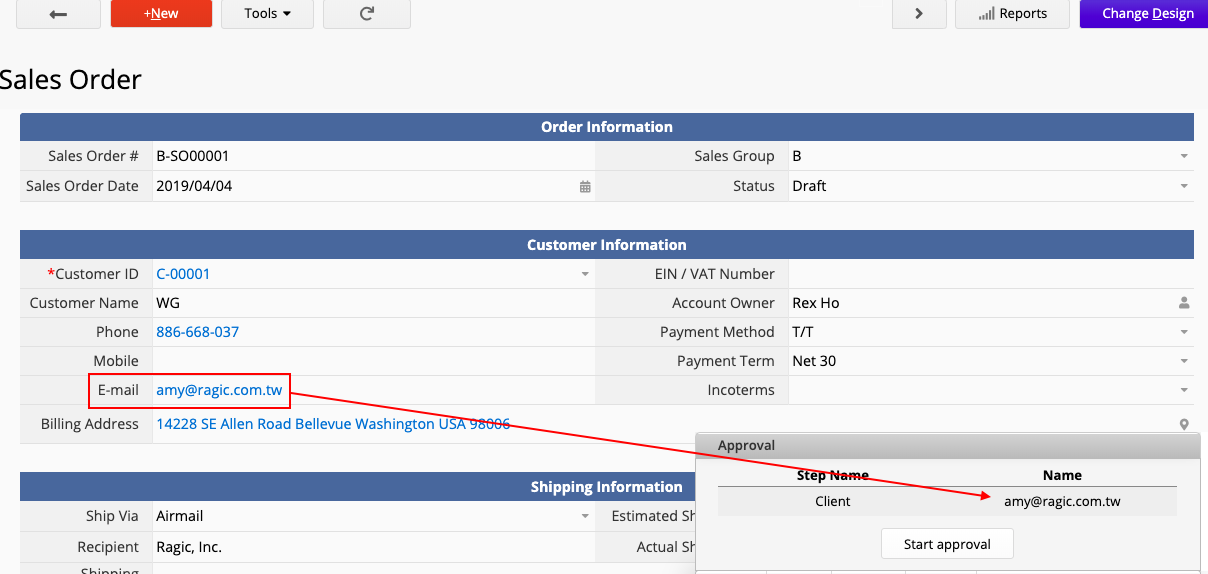
If you want to set non-users (such as clients and suppliers) as request approvers, you can choose the "E-mail" field. The approval request will then be sent to the designated email address, and it can be directly approved from the email.
You may also rearrange the order of approval using drag and drop.
Don't forget to "Save" before leaving.
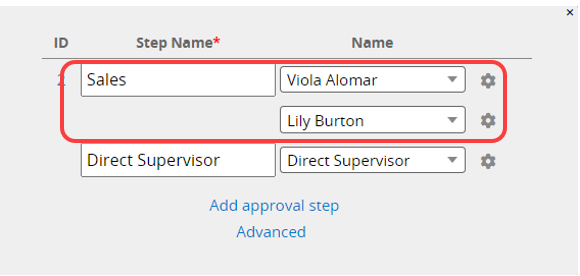
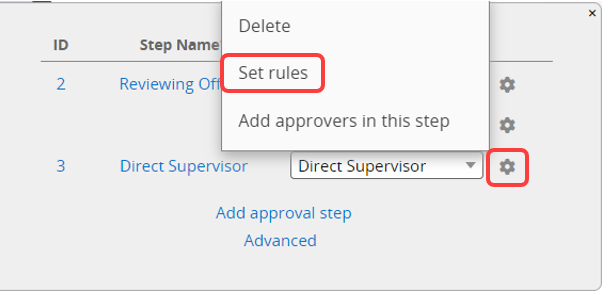
By clicking on the "gear" icon located just on the right of the approver selection menu, you can add approvers in this step. By doing this, all the approvers in this step must approve this sheet to proceed to the next approval step.

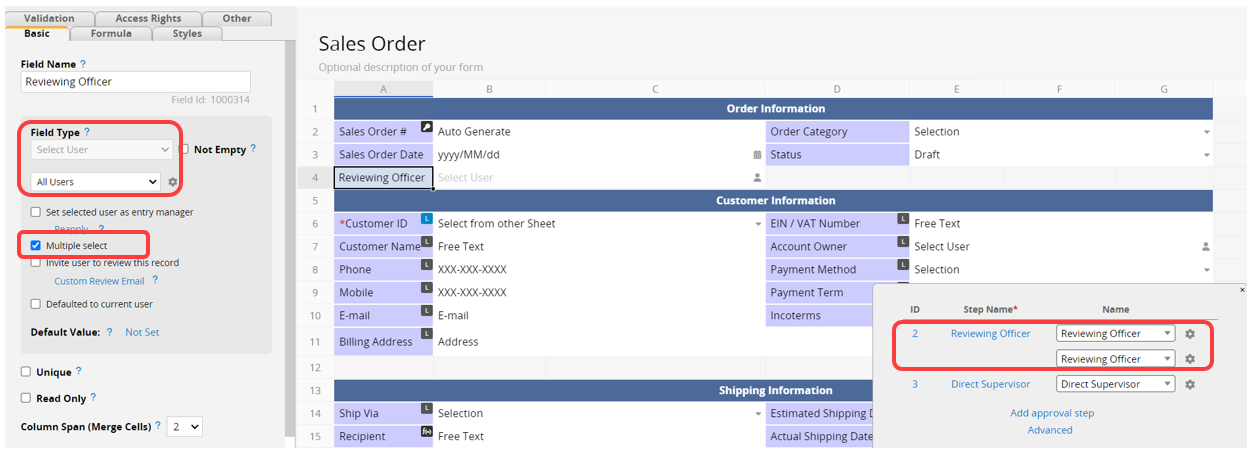
If you want users to determine the number of approvers at the same step, you can set up a Select User field and enable Multiple selection. Then, when configuring the approval process, select this field twice. This ensures that all the users chosen in this field must complete the approval step to proceed to the next one.
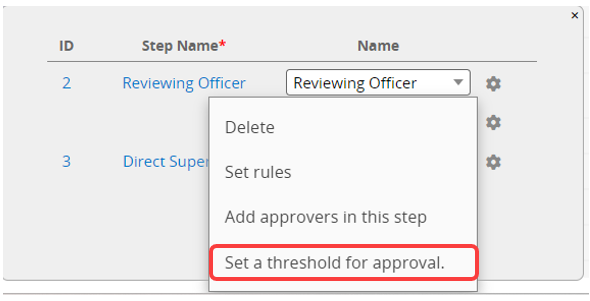
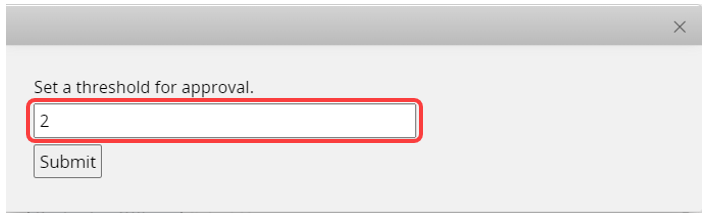
After adding approvers in a step, you can also Set a threshold for approval. For example, if there are three approvers on the first step of a record and you set its threshold for approval as 2, this record will proceed to the next step after two users in the first step have approved it.
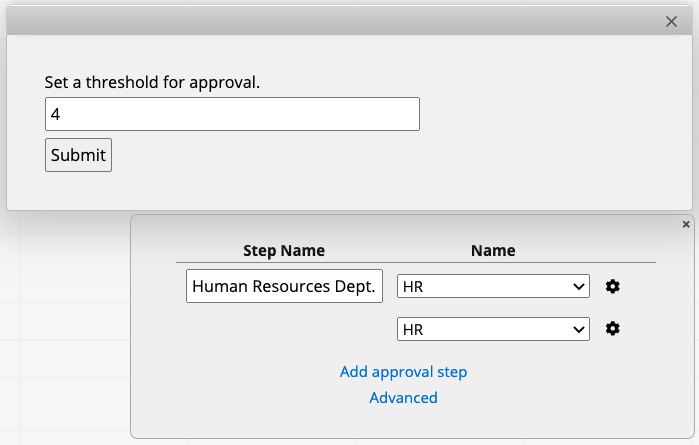
If you would like all members of one or more groups to approve a record, you would need to set at least two approvers in an approval step, which you can then set its threshold for approval.
For example, if the HR user group has four users and you would like all four users to approve before proceeding to the next step, you can set the HR user group or anyone in the HR user group in the approval step. After that, you’ll be able to see the threshold for approval, which you can then set as 4.
Below are some additional settings you can configure for your approval flow:
Strict identity verification: In the approval process, approvers will need to enter their password again.
Allow rejection: Approvers will be able to reject the approval.
Return to the previous approval step after rejection: Whether to allow rolling back to the previous step after rejection. When it is not enabled, rejecting will cancel the entire approval process.
Lock record when approval starts: The record will be locked once the approval process starts to prevent users from modifying it.
Start approval after saving a new record: The approval process will only start if one record meets all the following criteria:
1. No manual selection of approvers is required in any approval step.
2. Created by internal users.
Approve with handwritten signature: Users will see a handwritten signature window when approving.
Only notify the approval starter when approval is completed: This setting will not affect the users selected in "Notify these users when approval is completed".
Disallow canceling completed approvals: Once configured, the "Cancel approval" option is no longer available when approval is completed. The system will use the authority of the last approver to execute the action button. Therefore, ensure that the user who approves the last step has access to execute this action button for it to be auto-executed.
Disallow cancellation of approvals in process: By default, only the approval starter, SYSadmins can cancel the ongoing approval process. If you want to disallow the approval starter from canceling the ongoing approval, please enable this setting.
Note: Enabling this setting overrides all access rights settings, including Feature Access Settings. The approval starter cannot cancel the approval in this sheet, whether they are a SYSadmin or part of a group with "Cancel Approval" permission.
Hide reasons input box: the field for the approver to enter the reason will not be displayed.
Allow approval even when no approval step matches rule: Allow approval to start when no approval steps meet their respective rules and enable users to decide whether to complete it.
Notify approvers again after pending for? days: When no approvers have completed an approval step in a specified number of days, the system will automatically notify all approvers in this step again.
Notify these users when approval is completed: You can notify any user or user group.
Execute these action buttons after completing approval: The supported action buttons are as follows:
1. Custom Action Buttons (excluding Mail Merge)
2. Lock Record
3. Unlock Record
4. Apply all formulas to this record
5. Link & Load Sync
The system will automatically execute these Action Buttons regardless of whether the last approver has the access rights to execute them.
Once Action Buttons are configured, the approval flow cannot be canceled after it is finished.

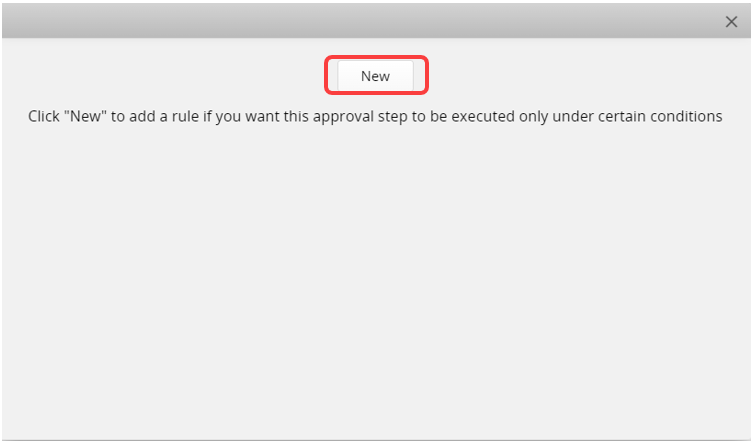
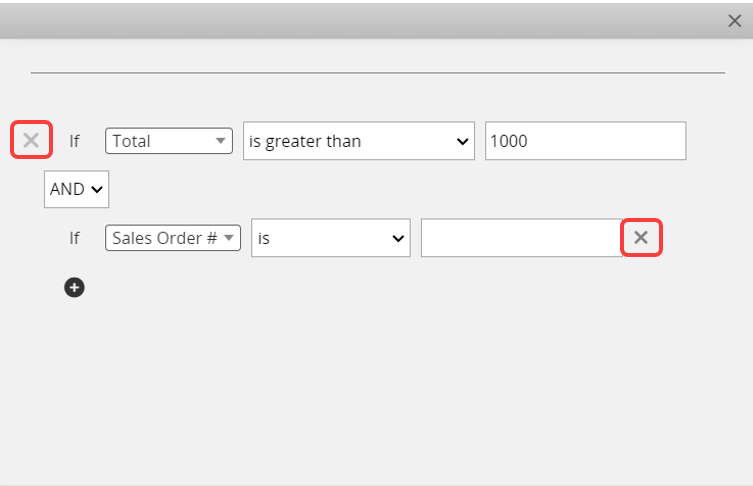
You can set rules to change the approval steps according to the values in the record. Click Set rules under the "Gear Icon" and click "New" to add a rule.
For example, you can create a rule stating that only orders totaling more than $1000 require sales manager approval. Additional rules can be added using the "+" sign.
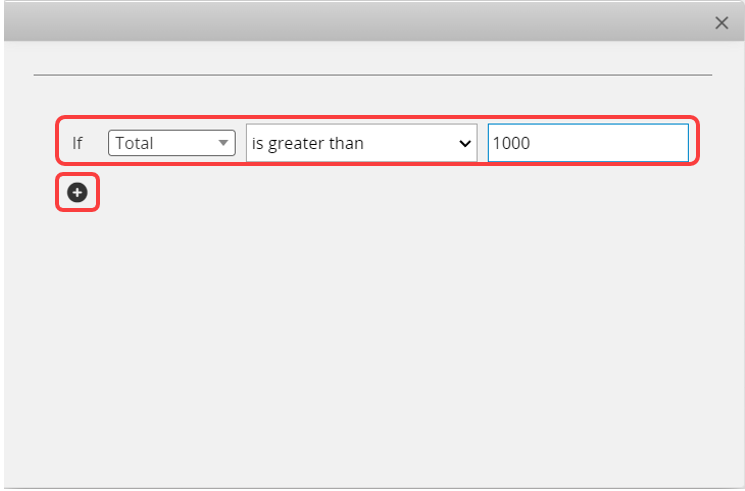
Otherwise, the approval process will skip that step.

Note: Please remember to remove the rules you don't need anymore by clicking "x". Otherwise, it will still be activated.
After adding an approval flow to your sheet, you can use the Listing Page Field Picker to add approval-related fields on the Listing Page.
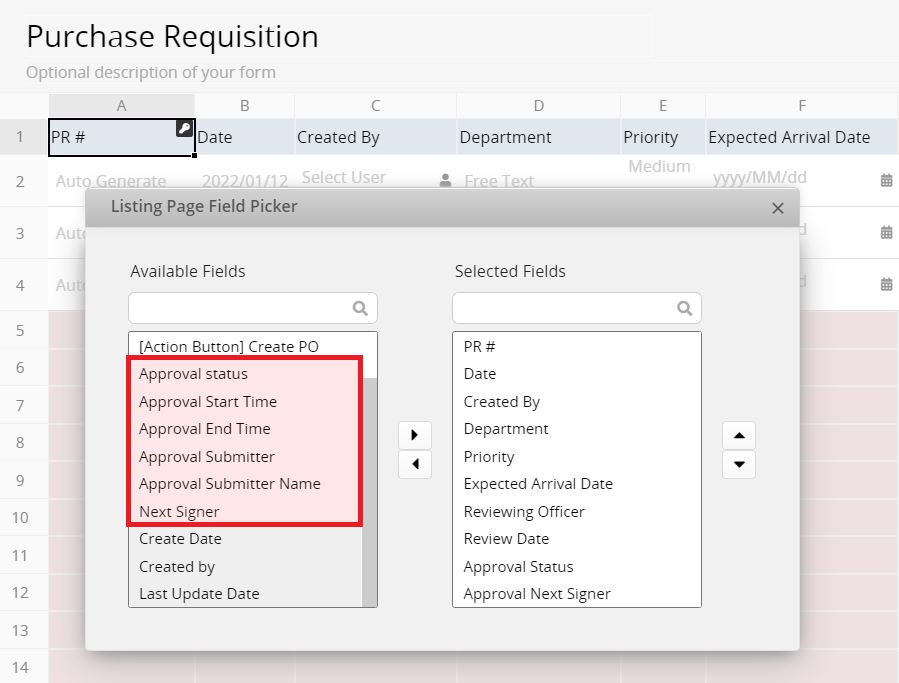
If you add these fields on the Listing Page, they will be automatically added on the bottom of the Form Page and set as Hidden by default.
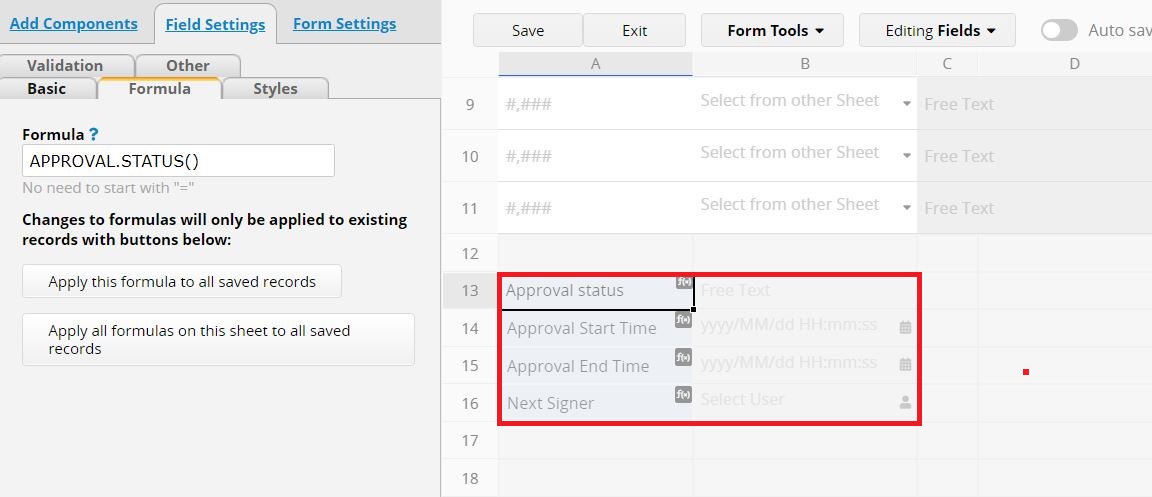
Alternatively, you may manually create fields and apply approval formulas to populate approval-related values. For example, if you would like to populate the status of the approval flow, you may create a free text field and apply the following formula.
APPROVAL.STATUS()
After saving, you can obtain the approval status of this record. You can use the Listing Page Field Picker to add new fields to the Listing Page.
Note:
The respective system values populated by applying the approval status formula are as follows:
N: New, indicating the approval process has not yet started or has been canceled.
P: Processing, indicating the approval process is ongoing and awaiting completion.
REJ: Rejected, indicating rejection by anyone approver.
F: Finish, indicating completion when all approvers agree.
If you want to convert these system values to text, you may refer to this document.
Only users with sufficient access right can Start Approval of the record, including SYSAdmin, users with Admin access right to the sheet, or users who are the "entry managers" (the entry creator or users who have been assigned to the entry) with Bulletin User or Survey User access right to the sheet.
You can refer to this document for further information on how to use the Approval Flow function in Ragic.
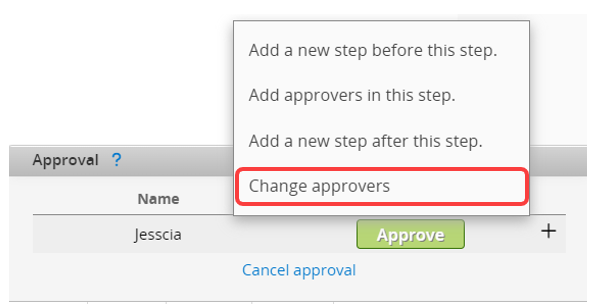
To change approvers, SYSAdmins can click the + icon and select Change approvers.
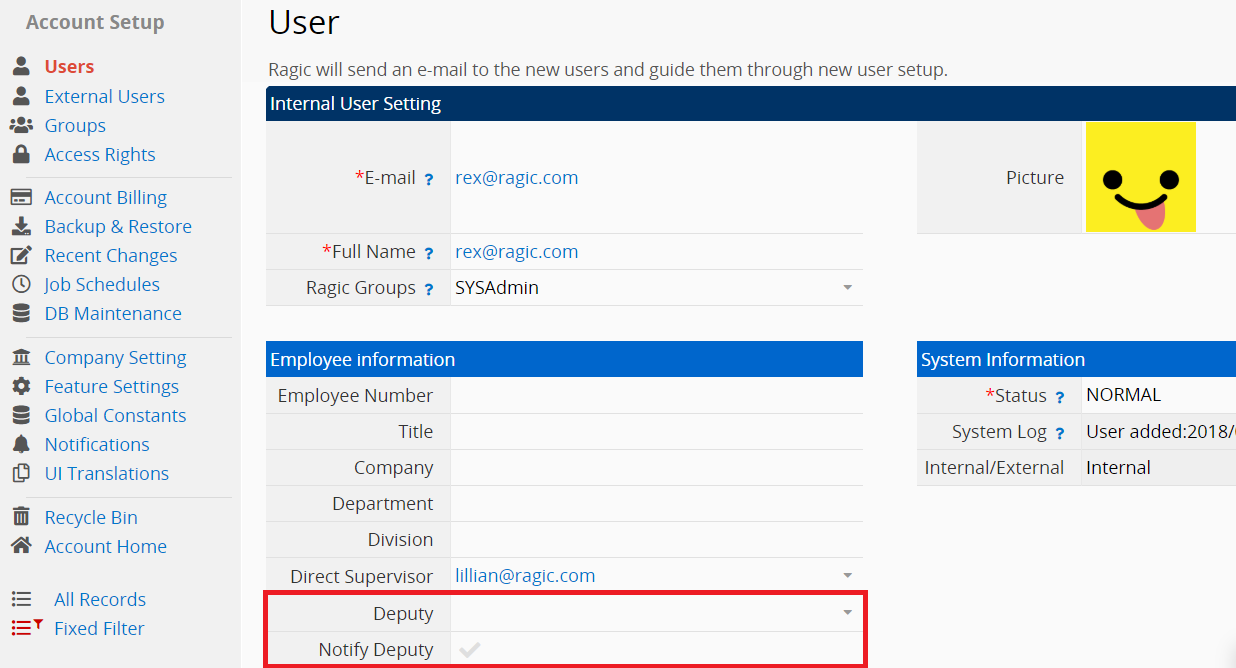
You can assign a deputy for users in the User Sheet allowing the deputy to approve or reject approval requests in the user's absence. For detailed information, please refer to this article.
Ensure that you check the Notify Deputy checkbox in Personal Settings so that your deputy will receive approval notifications and Emails.
Note:
If you can't see the Deputy field in your sheet, please contact Ragic support to update it.
For a clearer demonstration, you can refer to the following tutorial video.

